What carryover cooking is and when to pull meat off the heat
Carryover cooking raises the temperature of meat after it leaves the heat. Learn why it happens and the safe CDC minimums for your roast or steak.
- Jotted down by Gideon Hargrove
- 6 min fix
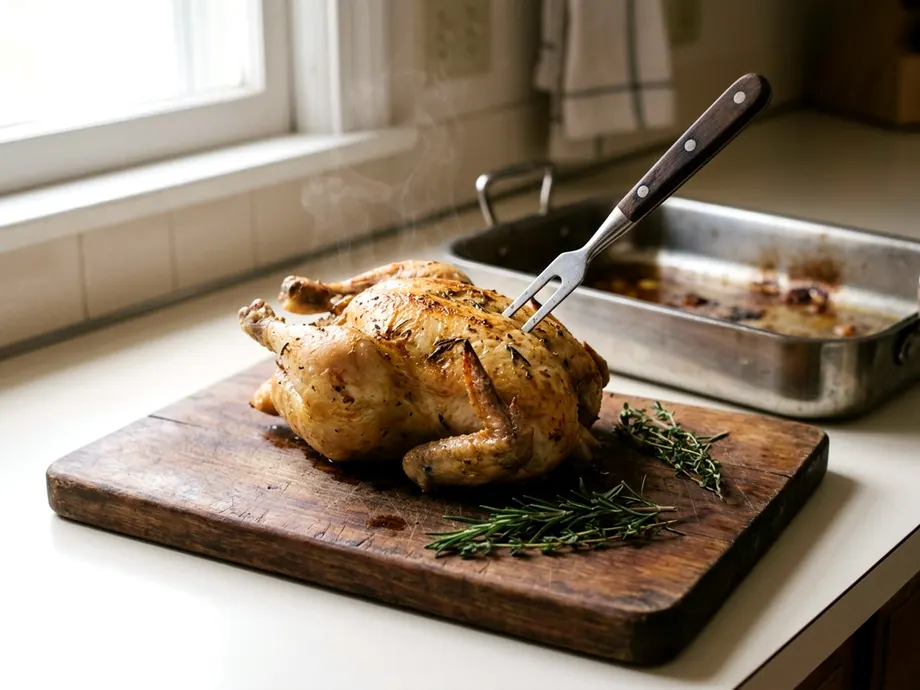
Carryover cooking happens when the hot outer layers of a roast pass their warmth to the cooler center. This raises the internal temperature by several degrees after the heat is off. Pull your meat right at the safe minimum temperature to keep it juicy.
Why the inside keeps cooking after the heat is off
Heat travels slowly through dense foods like a beef roast. The hot oven blasts the exterior while the center stays cool. The meat still radiates intense heat after leaving the oven. Some energy escapes into the air, and the rest moves inward toward the coldest part.
The center absorbs this traveling heat, pushing the internal temperature up after the burner is off. You will see the numbers climb on a food thermometer for a few minutes. The heat eventually evens out across the whole piece. The temperature then peaks and begins to drop.
Hot juices and dense muscle carry heat inward slowly. Carryover cooking happens in almost everything you heat up. Baked goods and thick vegetables also hold heat after cooking. Meat demands closer attention because the window between safe and dry is small.
Which foods rise the most while they rest
Large items with heavy mass drive the biggest temperature spikes. A whole turkey holds a massive amount of heat in its outer layers. The center of a large bird rises much higher than a thin pork chop after it leaves the oven. The internal temperature of a thin cut will barely shift.
High cooking temperatures change the math by building a much hotter crust than gentle baking. The hotter the outside, the more heat rushes toward the middle. A seared steak pushes a quick wave of heat inward. A slow-cooked brisket warms up evenly and often shifts less once it leaves the smoker.
The container you leave the food in makes a difference. Leaving a chicken breast in a heavy cast iron skillet adds more energy to the meat. Moving it to a room-temperature cutting board cuts off the external heat supply. Tenting the meat loosely with foil traps a little warmth, while wrapping a roast tightly traps more heat.
Treat the CDC minimums as the line you never cross
Raw meat must reach a safe internal temperature to kill harmful bacteria, even though carryover cooking pushes the final numbers higher. Pull your food off the heat exactly when it hits the safe minimum. Never pull meat at a lower temperature and hope the resting phase makes it safe. The resting phase might fall short.
The federal government publishes safe minimum temperatures to help prevent foodborne illness. You can rely on the safe minimum internal temperatures from the CDC for everyday meals.
Food type | Safe minimum internal temperature |
|---|---|
Whole cuts of beef, veal, lamb and pork | 145°F, followed by a 3-minute rest |
Ground beef and pork | 160°F |
All poultry, including ground chicken and turkey | 165°F |
Fish with fins | 145°F, or cooking until the flesh is opaque and separates easily with a fork |
Ground meats require higher temperatures because grinding mixes the outside surface into the center. Bacteria from the exterior get pushed deep into the patty. You have to heat the entire burger to 160°F. Whole cuts of beef, veal, lamb and pork still need to reach 145°F inside, followed by the 3-minute rest.
Measure in the thickest part with a food thermometer
A digital food thermometer is the only way to know when meat hits the safe minimum. Color and texture are unreliable, and a chicken breast might look white inside while hiding dangerous bacteria. A smoked turkey often looks pink near the bone even when it is fully cooked. You must measure the heat directly.
Insert the metal probe into the center of the roast or the thickest section of the breast. Avoid touching bone, fat or gristle with the tip of the thermometer. A probe touching bone can give a false reading, and so can fat pockets.
Check the temperature in a few different spots because large roasts heat unevenly. You want the lowest number you can find to meet the CDC minimum. Push the probe deep and watch the numbers change as you slowly pull it back out. The lowest number on the screen is the true internal temperature.
Wash the probe with hot soapy water after every use. A dirty thermometer transfers raw meat juices straight into your cooked food. You might want to tape measurement conversions inside a cabinet to help with other recipe details.
Rest steaks and roasts before you cut them
Resting gives the muscle fibers time to relax and hold onto their juices. Heat causes the protein strands in meat to shrink, which squeezes moisture toward the edges. Cutting a hot steak immediately lets all that trapped liquid spill out onto the plate. The meat left behind will taste dry.
The fibers relax as the temperature begins to drop from its peak, letting juices distribute evenly. A rested steak holds its moisture when you slice it. The CDC lists a 3-minute rest for whole cuts of beef, veal, lamb and pork. This short pause is part of the CDC safe minimum for those cuts and also helps the texture.
Large items require more time on the cutting board. The CDC lists no rest time for poultry, so rely on the 165°F reading and rest a whole chicken or turkey longer than a steak. Place the food on a rimmed cutting board to catch any stray drops. You can use the resting time to finish making a salad or setting the table.
Find the full temperature chart on foodsafety.gov
The basic CDC rules cover most daily dinners, but odd items need specific guidance. You might buy a duck, a whole ham or raw sausages. Different proteins carry different risks. The federal government publishes fuller safe cooking temperature charts online.
Check foodsafety.gov or the USDA Food Safety and Inspection Service for the full chart. Look there for any item this table does not list, because other foods have their own safe temperatures.
Print the government chart and stick it to your refrigerator. Having the numbers visible saves you from guessing when your hands are covered in flour. You can check the chart quickly while you figure out how to batch cook on Sunday.
Rescue meat that went too far with slicing and sauce
Carryover cooking sometimes pushes a roast past the ideal texture. You might pull a beef roast at exactly 145°F only to watch it climb higher than you wanted. The meat is completely safe to eat but might feel tough or dry. Slicing and a sauce can fix most of it.
- Slice the meat as thin as possible against the grain to shorten tough muscle fibers.
- Whisk chicken broth and butter into the roasting pan to make a quick sauce.
- Pour the hot pan sauce directly over the sliced meat to restore lost moisture.
Thick chunks of dry beef demand heavy chewing, but paper-thin slices break apart easily in the mouth. Always look for the long lines of muscle fiber running across the meat. Turn your knife to cut across those lines. Shortening the fibers makes every bite tender.
A rich pan sauce covers up dry edges immediately. You can also use cold condiments to fix a dry plate. A sharp chimichurri or a creamy horseradish sauce hides a chalky texture.
Save the worst disasters for a second meal. A terribly dry pork roast makes a great base for chili when you chop it into small cubes and simmer it in crushed tomatoes. The liquid softens the fibers over a long, gentle simmer.
Next snags we can fix
12 cooking measurement conversions to tape inside a cabinet
Print these 12 cooking measurements and tape them in a cabinet to quickly convert spoons, cups, and metric amounts while you cook.
Kitchen Rescues 8 min fix
How to batch cook on Sunday and keep it safe to eat
Plan batch cooking on a Sunday to prepare meals for the week, cool them fast and store them safely so they stay fresh and ready to eat.
Kitchen Rescues 6 min fix
How to clean oven racks with a soak instead of scrubbing
Learn how to clean oven racks with a simple overnight soak in the tub instead of heavy scrubbing. Get rid of baked on grease with dish soap and hot water.
Kitchen Rescues 6 min fix